How to Setup Webmin in CentOs 7
Introduction – What is Webmin
Webmin is an open source modern, web control panel for any Linux machine. Webmin is very similar to cPanel, it allows you to administer your server through a simple GUI (Graphic User Interface) interface. With Webmin, you can update settings, manage and monitor your server easily.
Key Takeouts
In this article, you will learn how to install and configure Webmin on your CentOs 7 server, secure access to the Webmin interface with a valid certificate using Let’s Encrypt.
You will also learn to use Webmin to add new user accounts, and update all packages on your CentOs 7 server.
Step 1: Install Webmin
Step 2: Configure SSL Certificate for Webmin
Step 3: Update all packages on your CentOs7 Server
Prerequisites – You will Need
Before we start, you will need:
- One CentOS 7 server set up, you can setup and deploy one CentOs 7 server using Vultr.
- A password set for the root user on your system. You will need to use the root user and password to log in to Webmin the first time. Use
sudo passwdto set the root user password. (If you setup and deploy your CentOs 7 server using Vultr you should be able to see your root password in your dashboard.) - Apache installed by following How To Install Linux, Apache, MySQL, PHP (LAMP) stack on CentOS 7. We’ll use Apache to perform Let’s Encrypt’s domain verification.
- Nano installed. Nano a text editor for Unix-like computing systems or operating environments using a command-line interface.
- A Fully-Qualified Domain Name (FQDN), with a DNS A record pointing to the IP address of your server.
Step 1: Installing Webmin
First, we need to add the Webmin repository so that we can easily install and update Webmin using our package manager(yum). We do this by adding a new file called /etc/yum.repos.d/webmin.repo that contains information about the new repository.
Create and open this new file using your text editor:
sudo nano /etc/yum.repos.d/webmin.repo
Then add these lines to the file(webmin.repo) to define the new repository:
[Webmin]
name=Webmin Distribution Neutral
#baseurl=http://download.webmin.com/download/yum
mirrorlist=http://download.webmin.com/download/yum/mirrorlist
enabled=1
Save the file and exit the editor.
Next, add the Webmin author’s PGP key so that your system will trust the new repository.
Execute the following lines:
wget http://www.webmin.com/jcameron-key.asc
sudo rpm --import jcameron-key.asc
Note: Before you install Webmin, make sure you have set a password for the root user by running sudo passwd, as you will need this to log in to Webmin later.
Once you have everything setup. You are ready to install Webmin on your CentOs 7 server. Execute the following line to install webmin.
sudo yum install webmin
Wait for the installation process. Once the installation process has finished, you will see the following output message.
Webmin install complete. You can now login to https://your_domain:10000/
as root with your root password.
Congratulations! You have successfully installed Webmin on your CentOs7 Machine.
Step 2: Adding a Valid Certificate with Let’s Encrypt
Now, let’s secure the access to Webmin portal by adding a valid SSL certificate.
Webmin is already configured to use HTTPS, but it uses a self-signed, untrusted certificate. Let’s replace it with a valid certificate from Let’s Encrypt.
Navigate to https://your_domain:10000 in your web browser, replacing your_domain with the domain name you pointed at your server.
Note: When you navigate to the Webmin portal at your first time, you will see an “Invalid SSL” error. This is because the server has generated a self-signed certificate. Allow the exception to continue so you can replace the self-signed certificate with one from Let’s Encrypt.
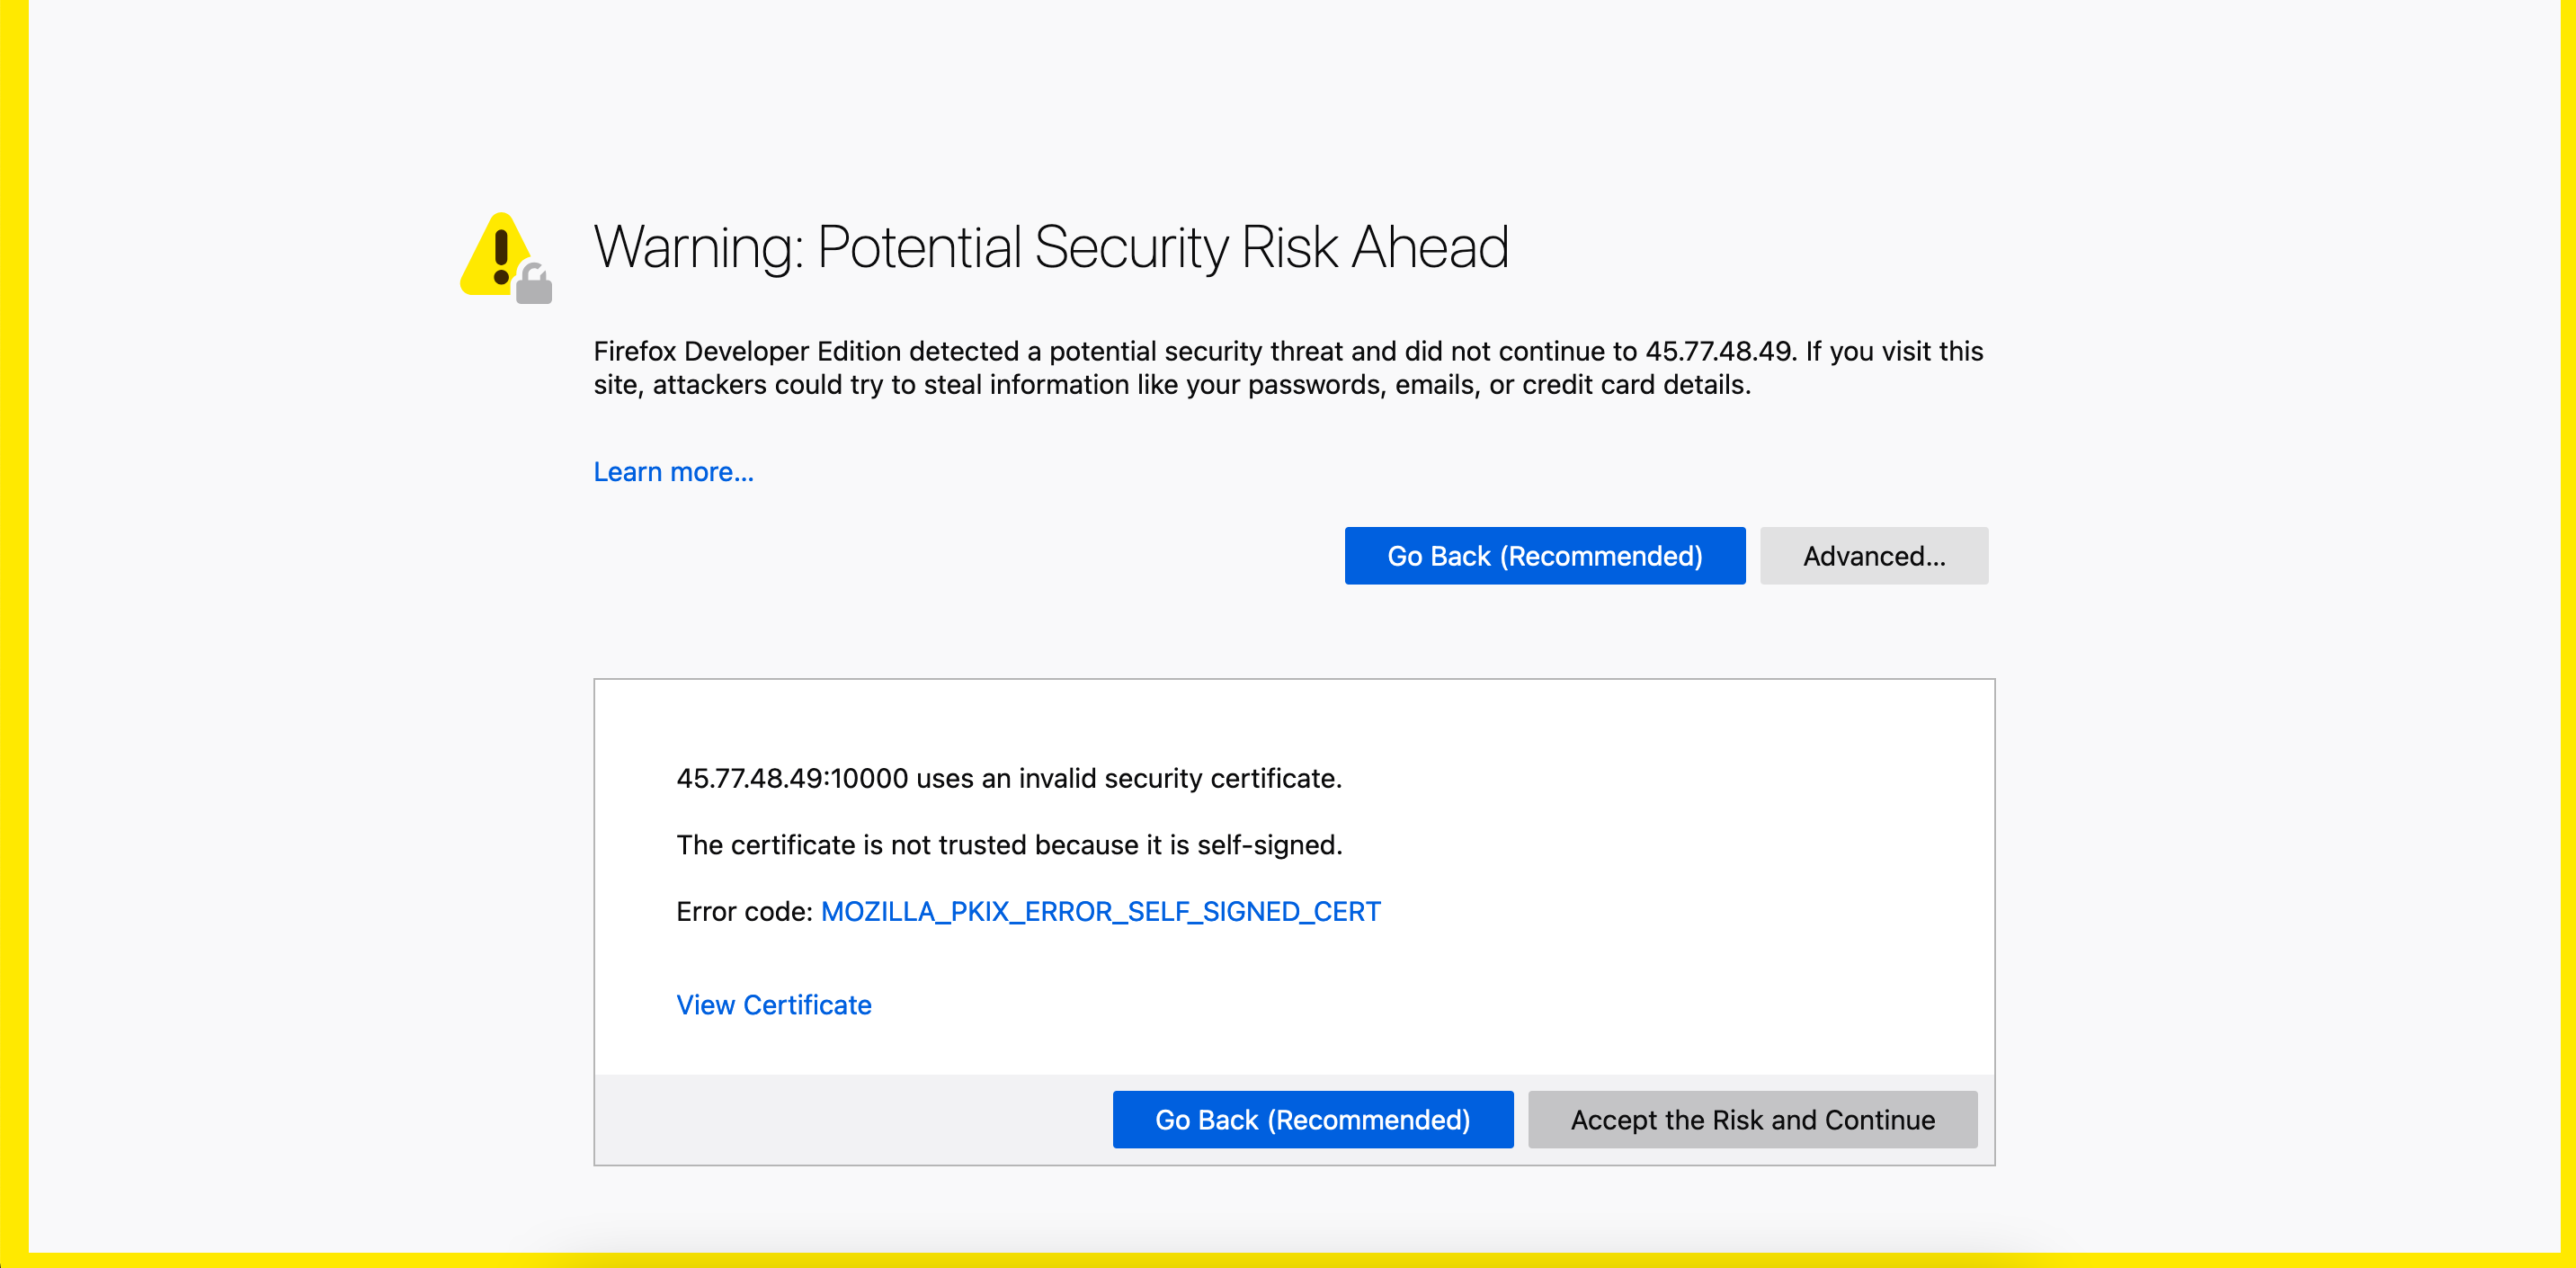
Webbrowser Warning
Next, you will be presented with a Webmin login screen. Sign in with the username root and your current root user password.
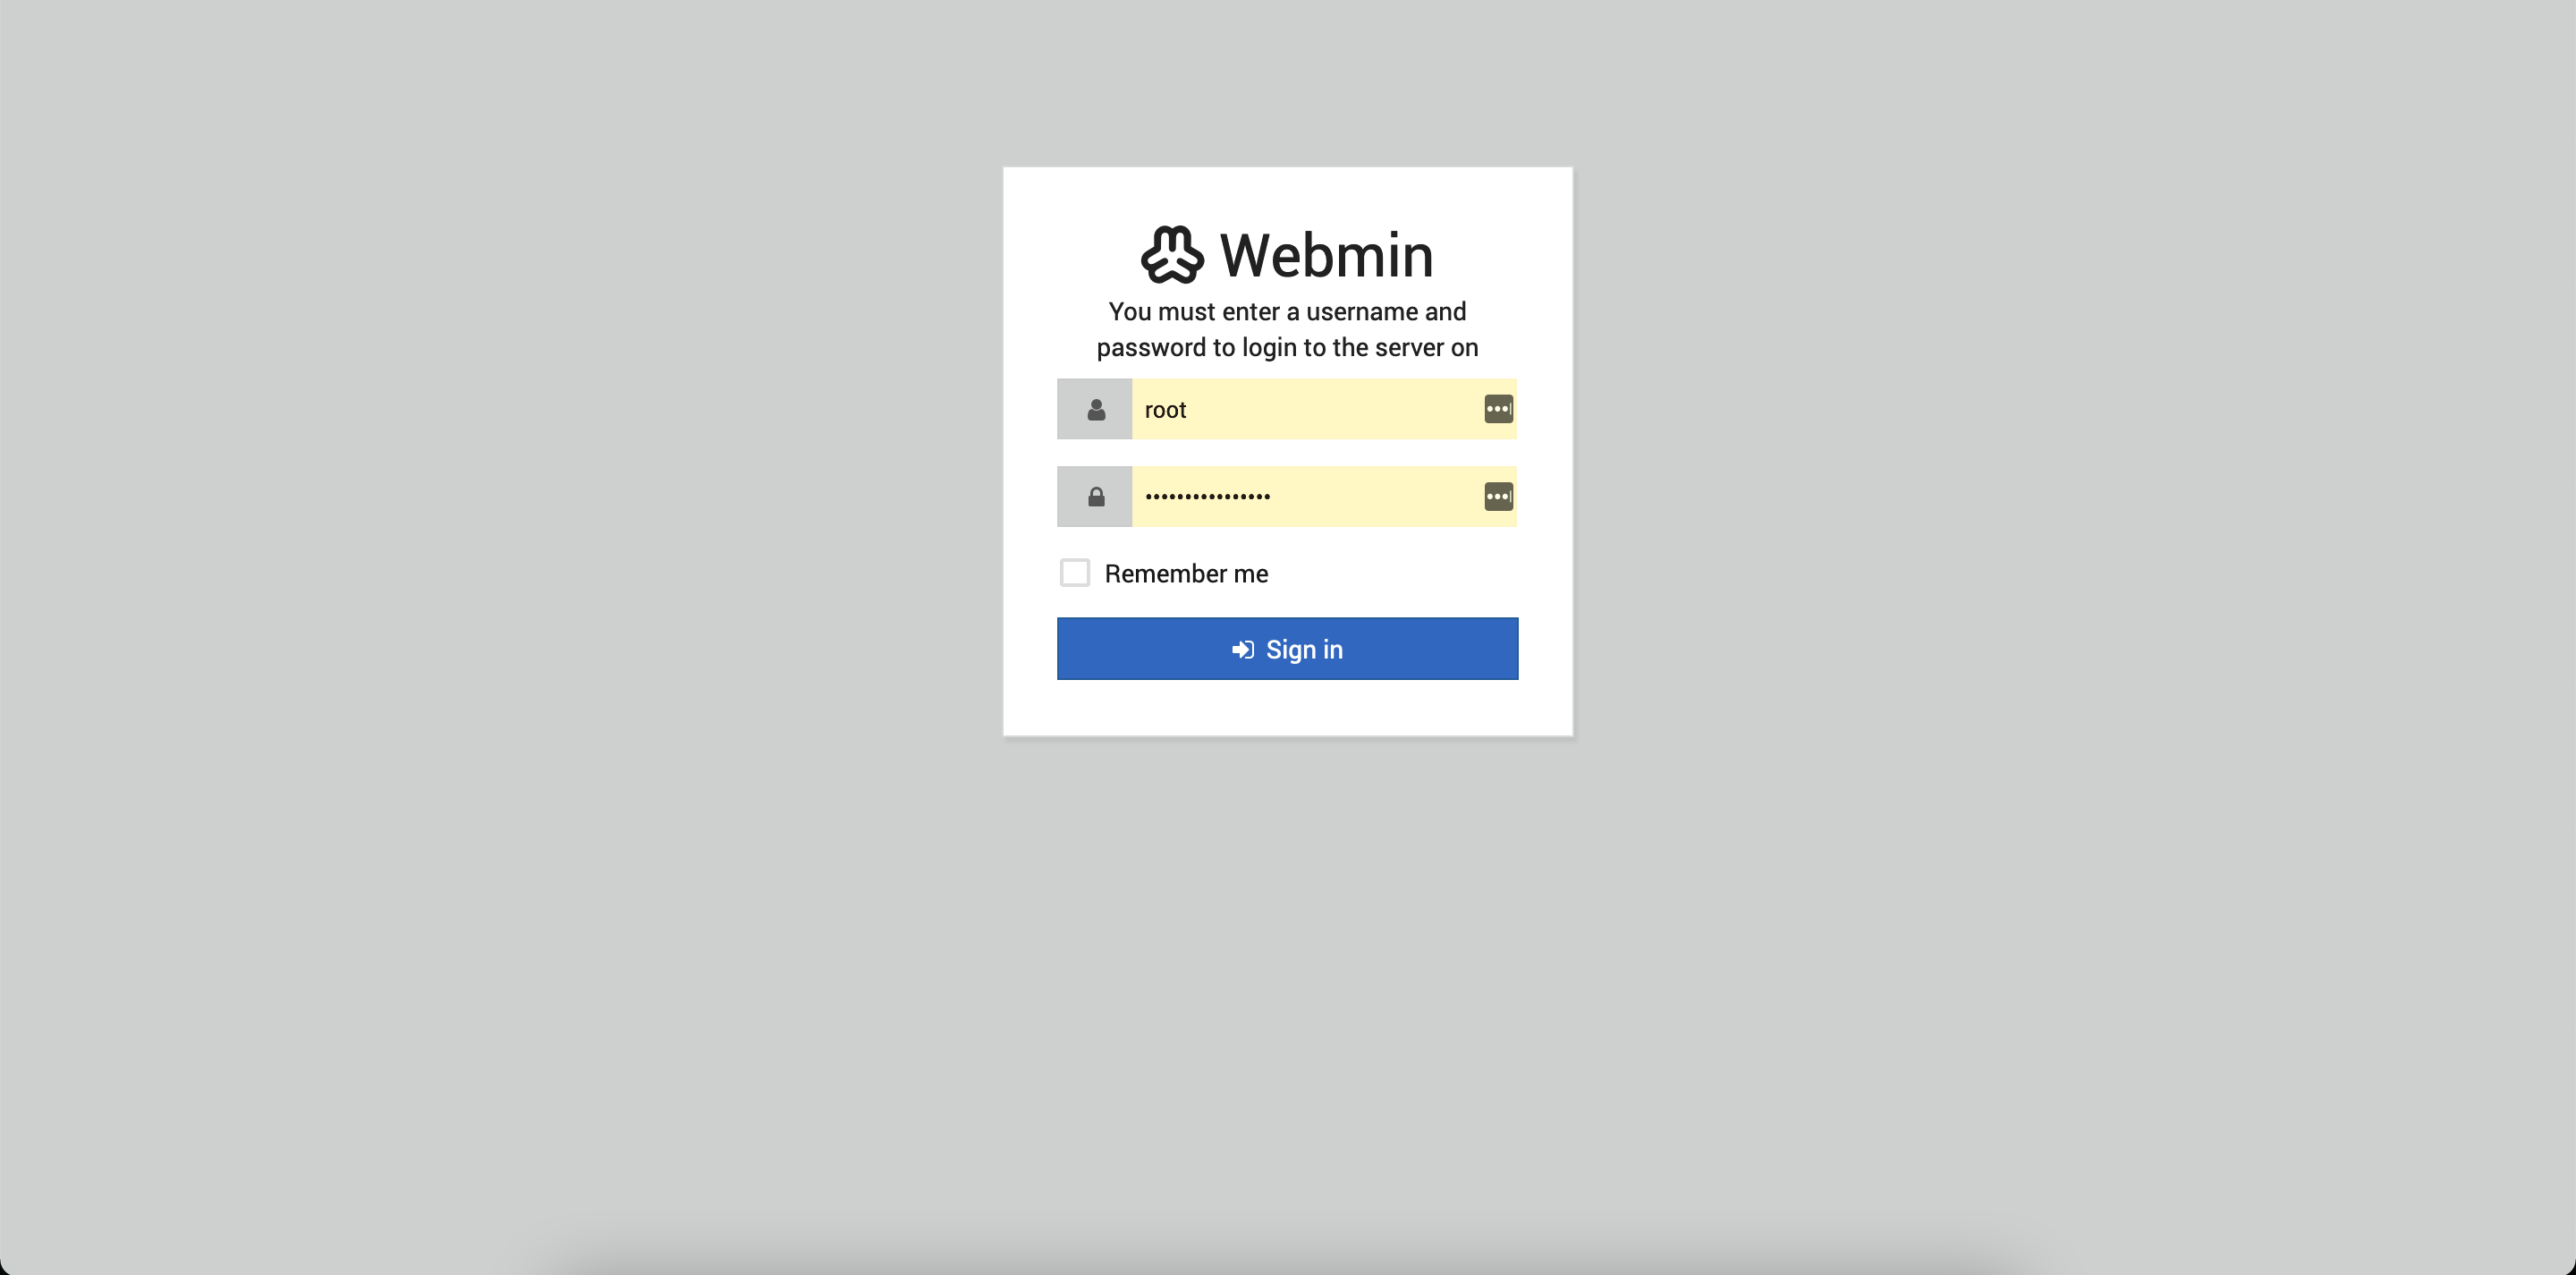
Webmin Login Portal
Once you log in, the first screen you will see is the Webmin dashboard. Before you can apply a valid certificate, you have to set the server’s hostname. Look for the System hostname field and click on the link to the right, as shown in the following figure:
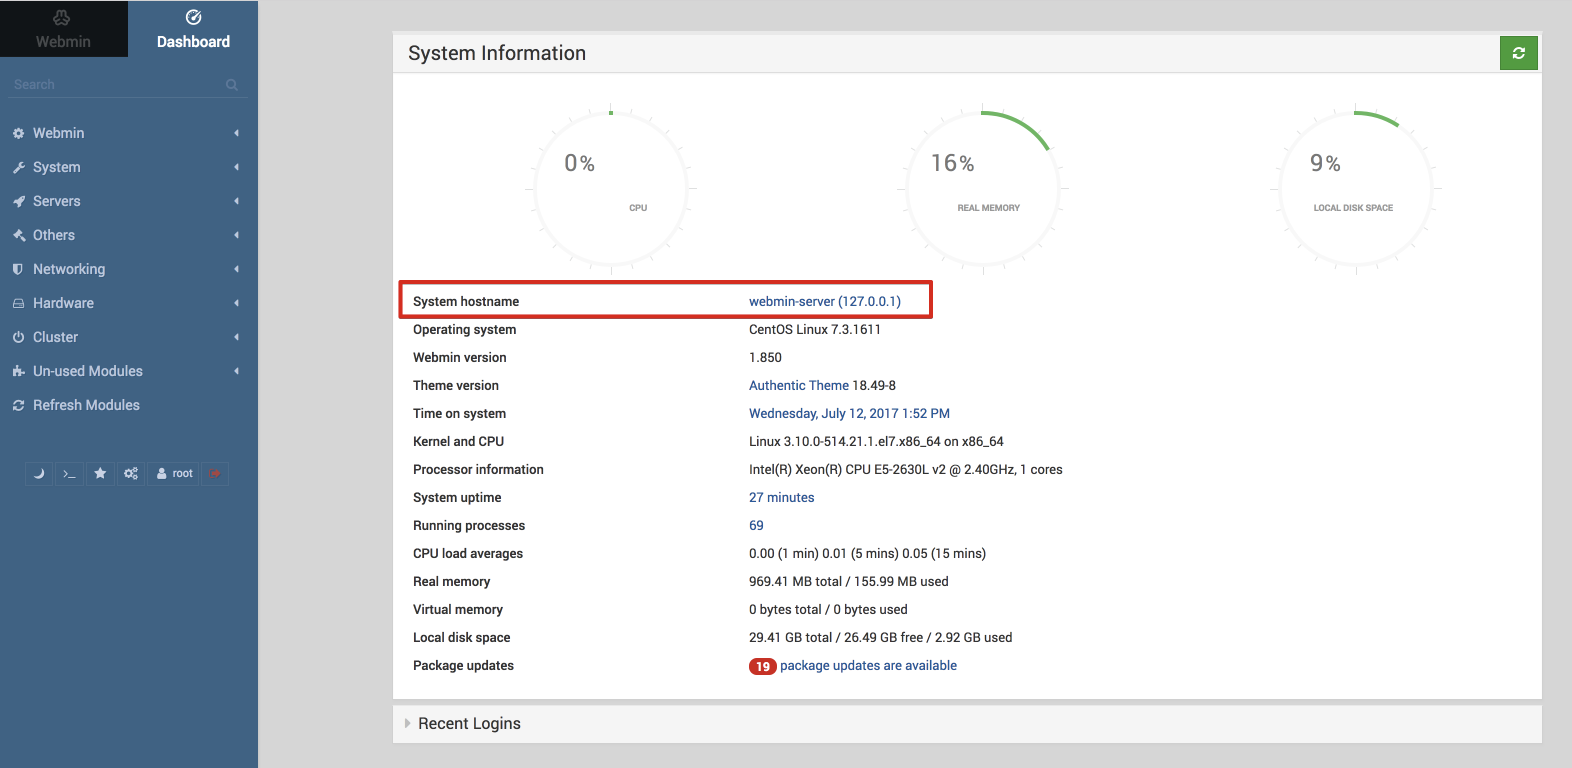
WebminPortal
This will take you to the Hostname and DNS Client page. Locate the Hostname field, and enter your Fully-Qualified Domain Name into the field. Then press the Save button at the bottom of the page to apply the setting.
After you have set your hostname, click on Webmin on the left navigation bar, and then click on Webmin Configuration.
Then, select SSL Encryption from the list of icons, and then select the Let’s Encrypt tab. You’ll see a screen like this:
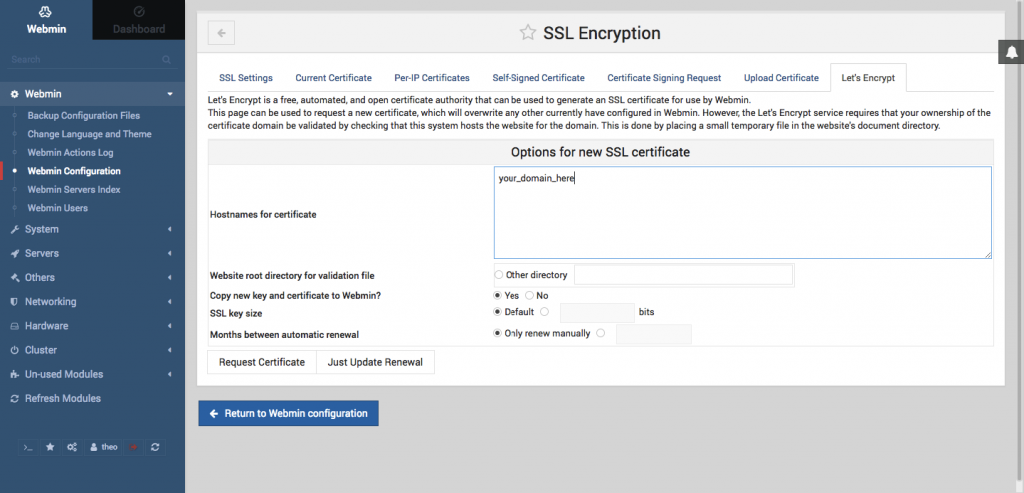
WebminSSL Certificate Install
Using this screen, you will tell Webmin how to obtain and renew SSL certificate. Let’s Encrypt SSL certificates expire after 3 months, but we can command Webmin to automatically attempt to renew the Let’s Encrypt SSL certificate every month.
Let’s Encrypt looks for a verification file on our CentOs 7server, so we’ll configure Webmin to place the verification file inside the folder /var/www/html, which is the folder that the Apache web server you configured in the prerequisites uses. Follow these steps to set up your certificate:
- Fill in Hostnames for certificate with your FQDN.
- For Website root directory for validation file, select the Other Directory button and enter
/var/www/html. - For Months between automatic renewal section, deselect the Only renew manually option by typing
1into the input box, and selecting the radio button to the left of the input box. - Click the Request Certificate button. After a few seconds, you will see a confirmation screen.
You will receive a successful message once your SSL Certificate has been configured corrected and installed.
To use the new certificate, and load Webmin securely, simply reload the page. Your browser should now indicate that the certificate is valid, you might need to re-login.
Step 3: Using Webmin
You have now set up a secured, working instance of Webmin. Let’s take a look at how to use it to update your CentOs7 server packages.
Webmin has many different modules that can control everything from setting up a mail server to configuring your PHP/Apache modules and Firewall settings. (This will be covered in a new series of articles, not covered in this).
Updating CentOs 7 Packages
Webmin can help you update all of your server packages through its user interface.
To update all of your server packages, first, go to the Dashboard link, and then locate the Package updates field. If there are updates available, you will see a link that states the number of available updates, just like the following screenshot.
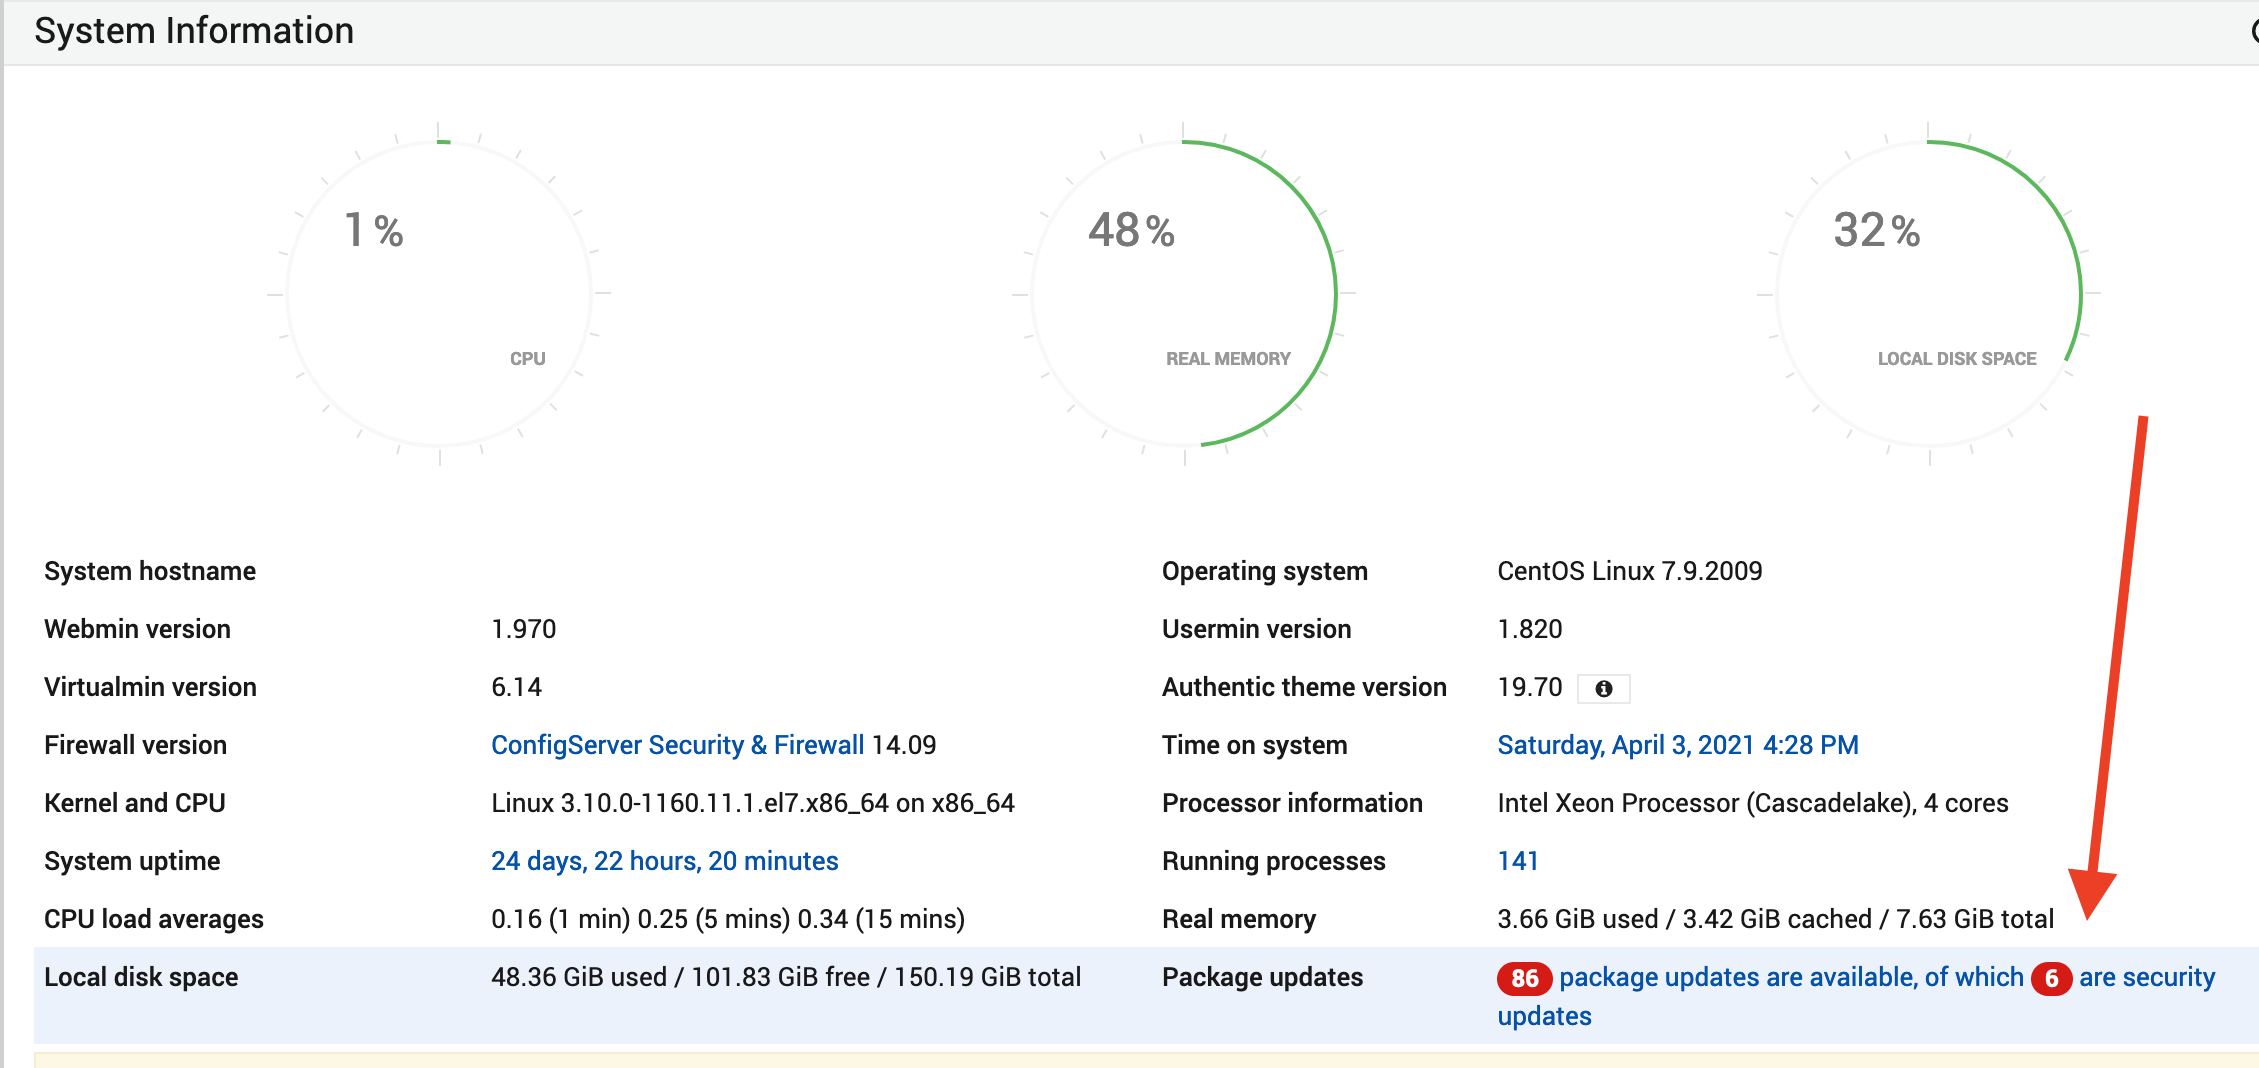
Webmin CentOs7 Update Package
Click this link, then select the packages you want to update or Select all (as shown in the screenshot below) then press Update selected packages to start the update.
Depending on the circumstances, you may be prompted to reboot the server, which you can also do through the Webmin interface as well.
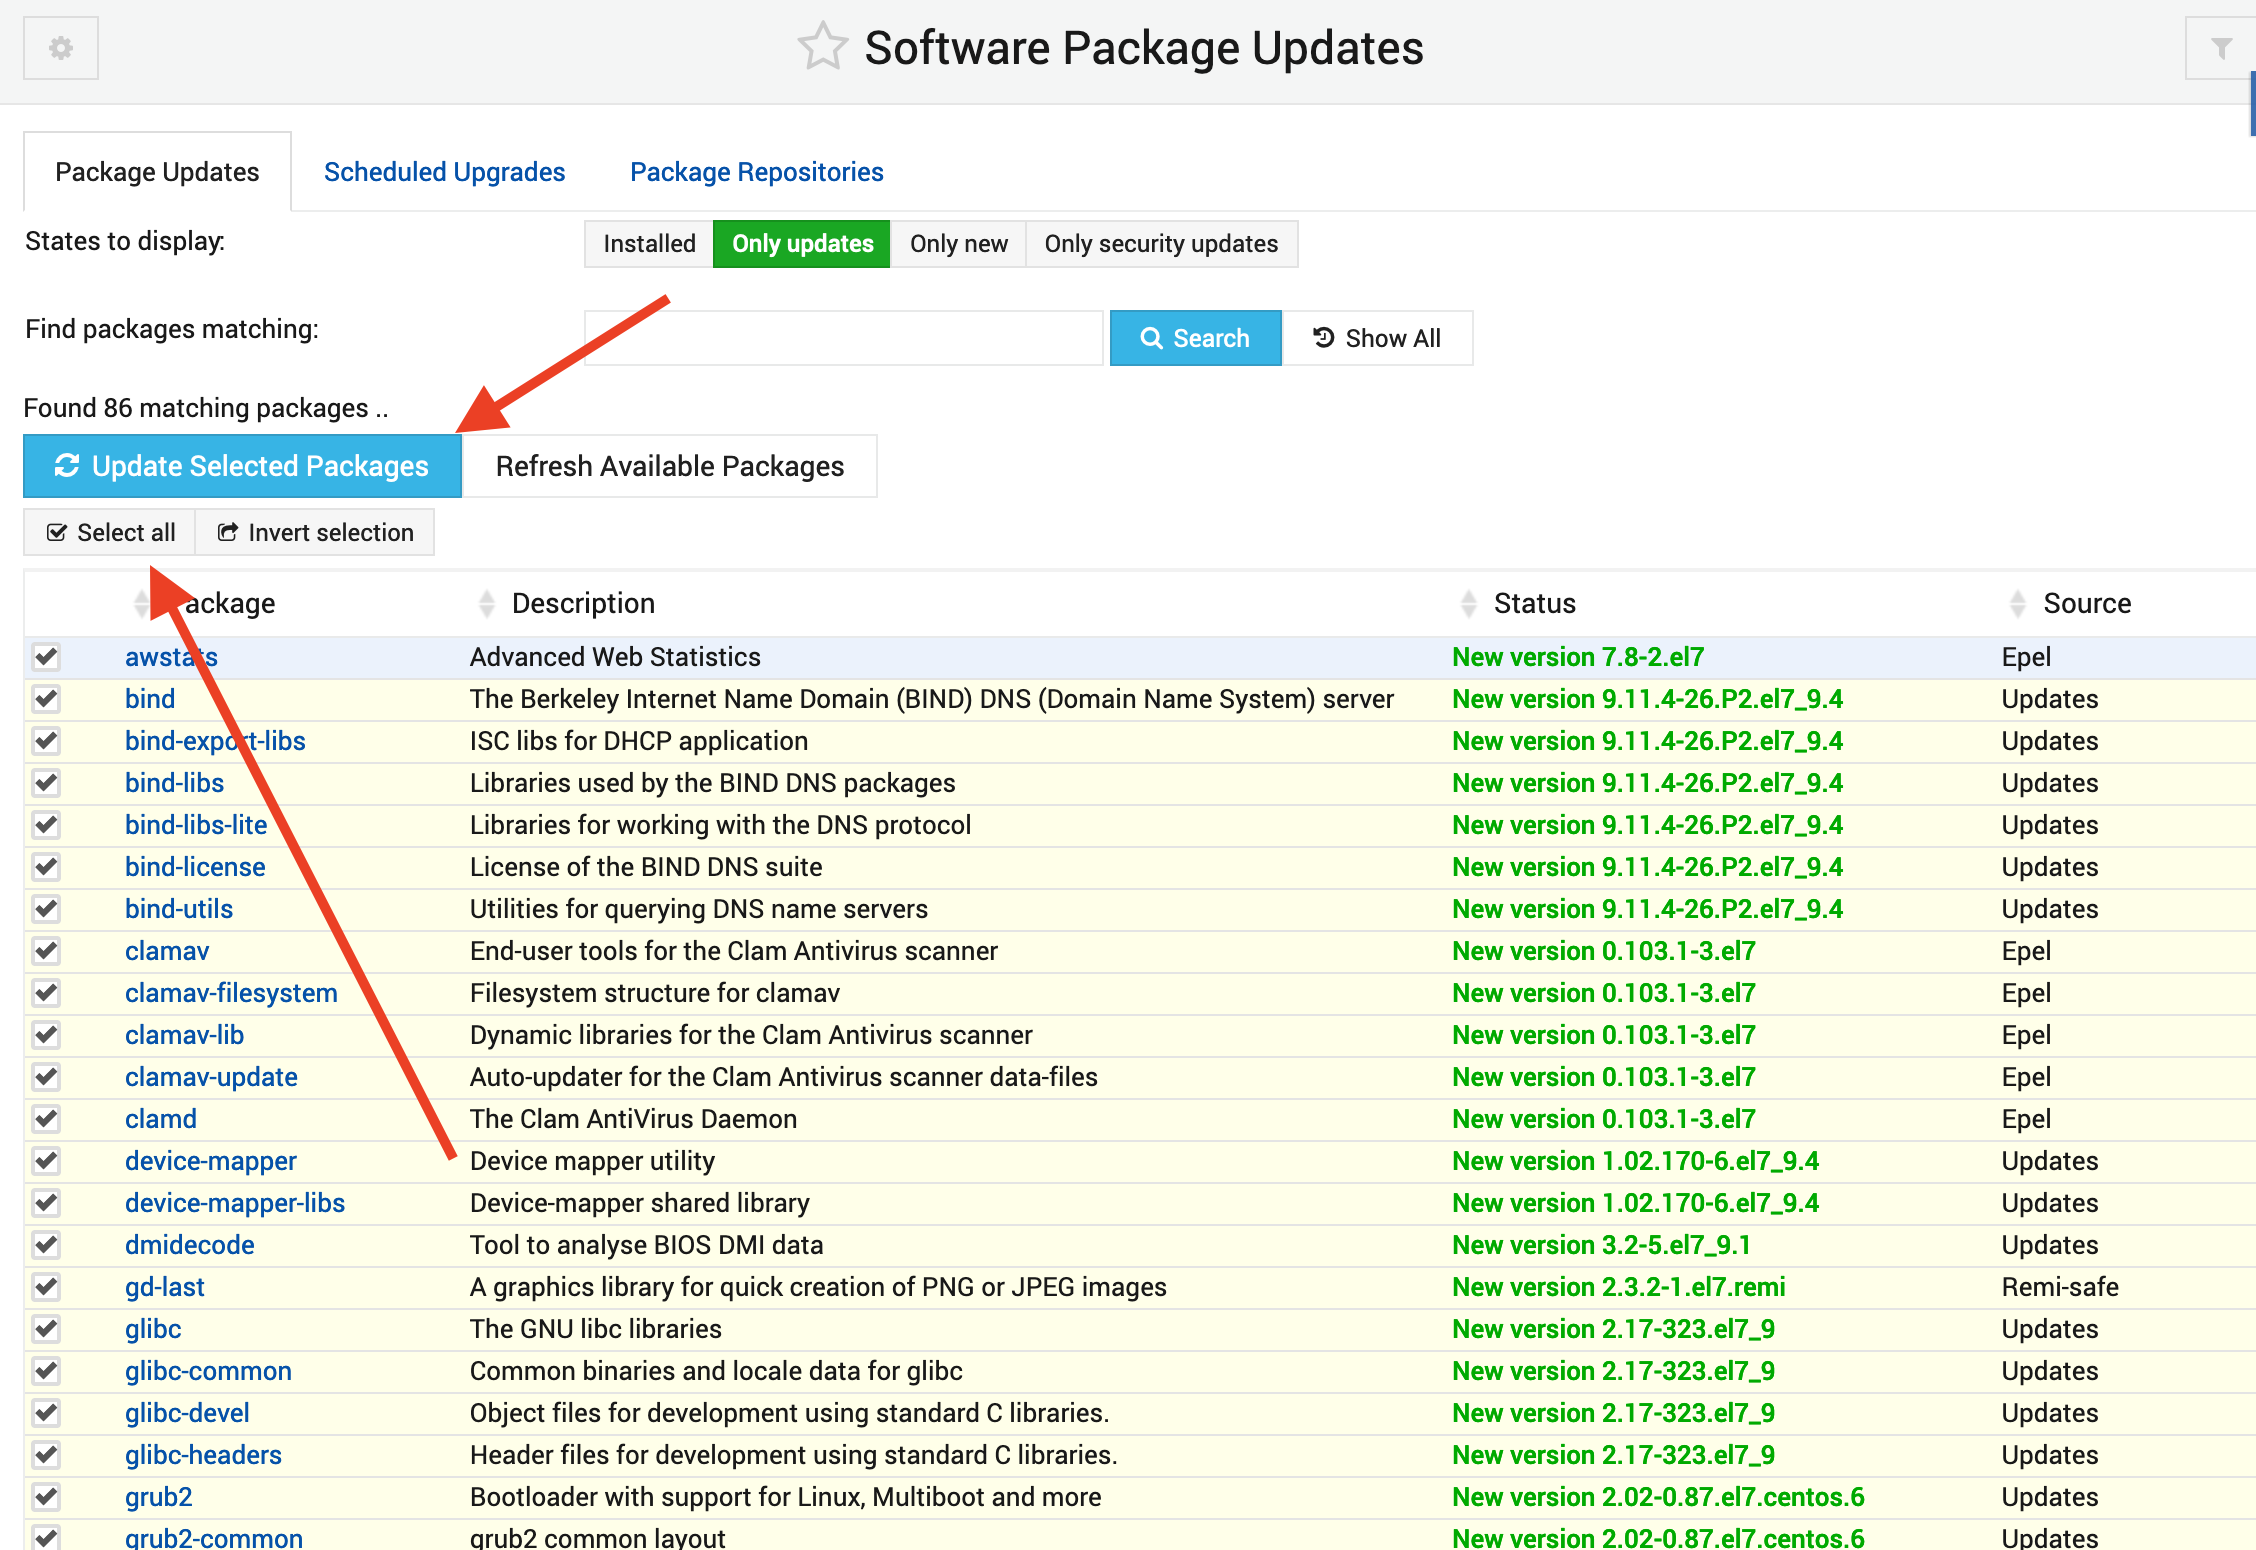
Webmin CentOs7 Update Package Portal
Conclusion – In a Nutshell
You now have a secured, working instance of Webmin and you have used the interface to update packages on your Centos 7 Server. Webmin gives you access to many things and is highly scalable which you can install 3rd party modules to assist you in managing your Centos 7 Server.
For example, if you have Apache installed, you should be able to find the configuration tab for it under Servers, and then Apache and configure your Apache webserver.